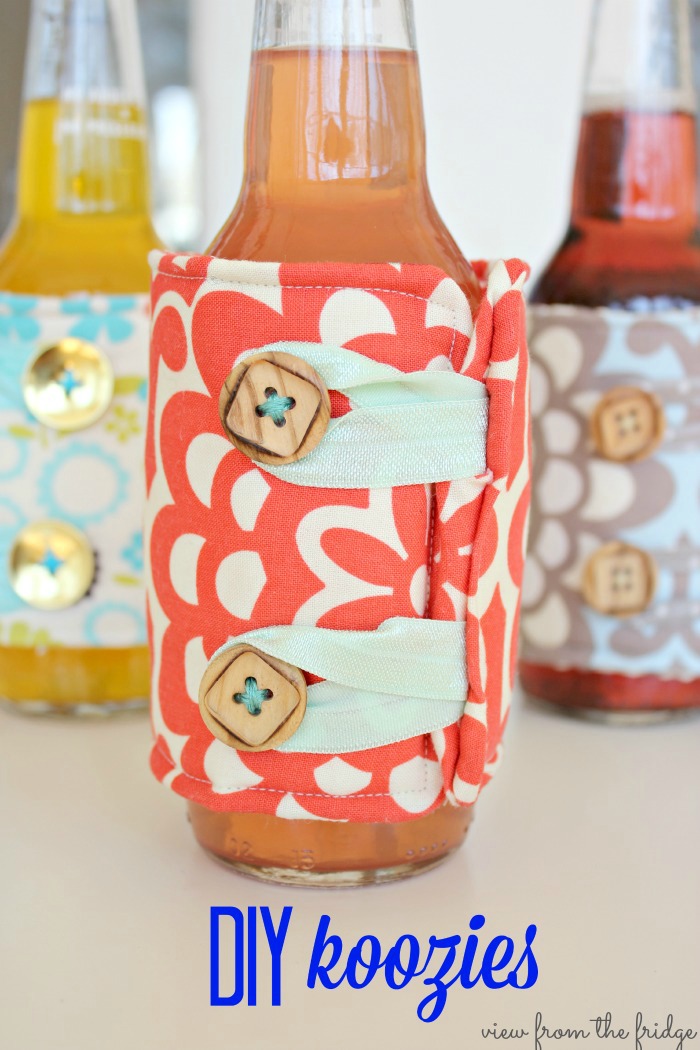
You are all in for a great treat today! Katie from View from the Fridge stopped by to share a step by step tutorial for creating DIY Koozies!
Hello, Polished Habitat readers! I’m simply thrilled to be here today sharing a fun project with you … DIY Koozies!
Now … before I begin I want to first say that you DON’T need to be a good seamstress for this project!!
Really … the majority of the work involves cutting fabric, pinning the fabric pieces together, a little ironing, and some manual button sewing.
The sewing machine part takes only about a minute (maybe two), and it’s a simple rectangle. Easy Peasy … even for a very beginner (I promise!). (And if you’re an expert … bear with me, as I am not).
SUPPLIES
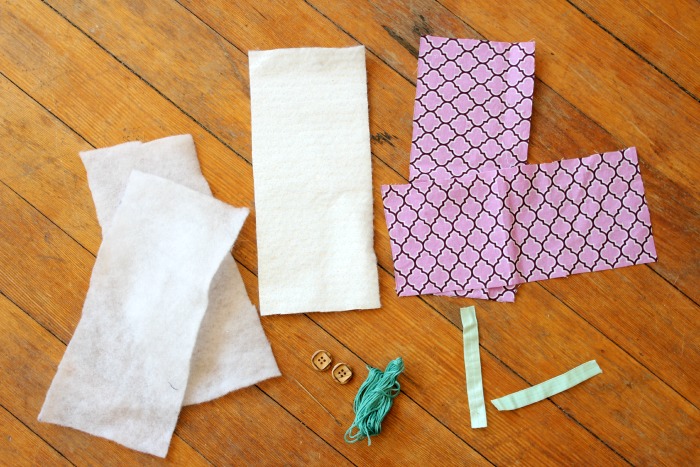
For each Koozie, here’s what you’ll need:
SUPPLIES
- 2 pieces of fabric cut to 4.5″ x 11.5″ (I used the same fabric for the inside and outside of each koozie, but you could totally jazz it up a bit with two different patterns here).
- 2 pieces of batting also cut to 4.5″ x 11.5″
- 1 piece of Insul-Bright cut to 4.5″ x 11.5″. This just looks like ‘stiffer’ batting, and you can usually find it in the fabric store by the interfacing. It’s just insulated batting that works to keep things hot or cold (hence the definition of insulation, I guess). 🙂
- 2 large buttons
- 2 pieces of elastic cut to about 4″ each. I used some fold over elastic (buy this at the fabric store in the notions aisle), but you could totally use regular elastic, or even a thicker hair rubber band.
- Sewing supplies (thread of your color choice, sewing machine, supplies for manually sewing on a button … I used embroidery floss and a larger needle).
The longest part of this whole process is cutting all the fabric pieces. Second longest (at least for me) was manually sewing on the buttons. I’m not sure I know how to properly do this, but they’re secure and look just fine to me!
How To Make A DIY Koozie
Here’s the picture version (don’t be alarmed by the number of steps … this whole thing takes about 10 minutes after you cut your fabric!).
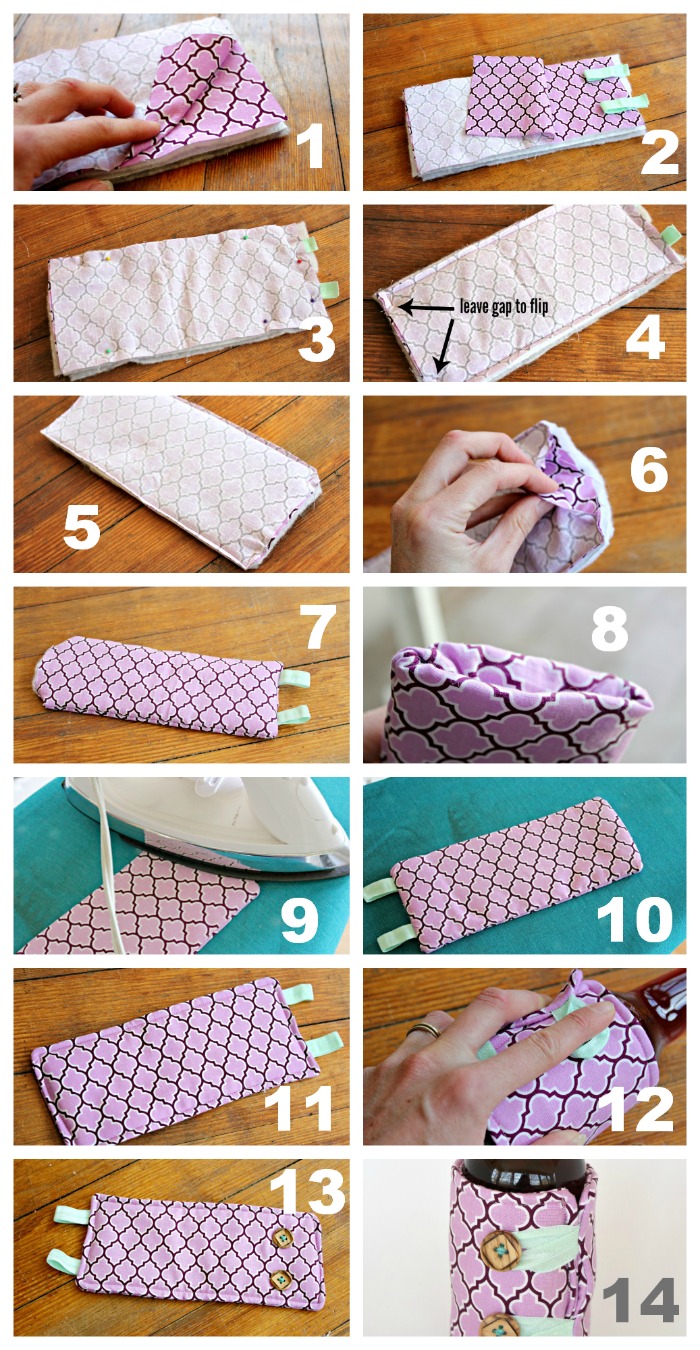
And the details of each step:
- Make a fabric ‘sandwich’ with your fabric pieces, batting, and insul-bright in this order (from bottom to top):
- Batting
- Insul-Bright
- Batting
- Fabric piece FACE UP
- Fabric piece FACE DOWN
- Fold your elastic pieces in half and pin between the two fabric pieces on one end. The loop should be facing IN (ends hanging off the outside of ‘sandwich’).
- Pin fabric sandwich together
- Starting near the corner on the short side opposite the one with the elastics, sew around sandwich rectangle leaving a 3.5″ gap (gap will be on short side opposite the elastics. Be sure to backstitch at start and end of stitching.
- Trim excess fabric from the three edges without the gap (you’ll need the extra fabric to tuck in at the gap after flipping).
- Open up the ‘sandwich’ between the two fabric pieces that have right sides facing.
- Flip the sandwich so fabric pieces are right side out.
- Tuck the extra fabric inside at the gap.
- Iron entire sandwich on both sides.
- Pay particular attention to ironing down fabric tucked into gap.
- Top stitch around entire koozie (about 1/4″ from edge seam). This top stitching should close gap on the one end.
- Roughly measure where your buttons need to go by wrapping koozie around bottle, stretching elastic pieces, and marking spots for button.
- Stitch on buttons. I think my machine does this, but I haven’t a clue how to use it, so I resorted to a needle and embroidery floss.
- COMPLETE!! Hooray … time to pop the top!
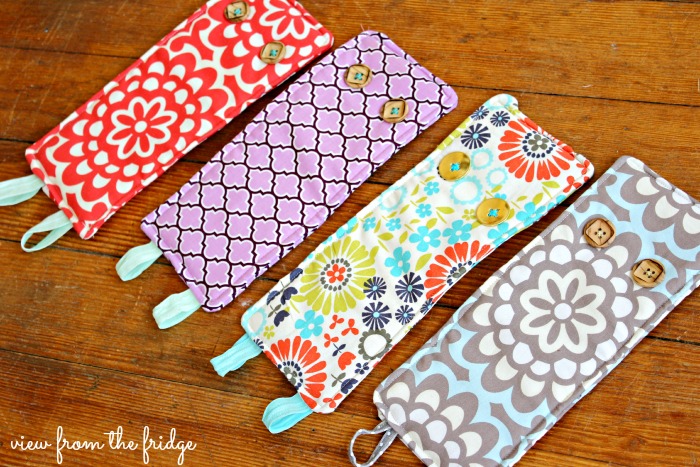
From Naked Bottles …

NAKED BOTTLES
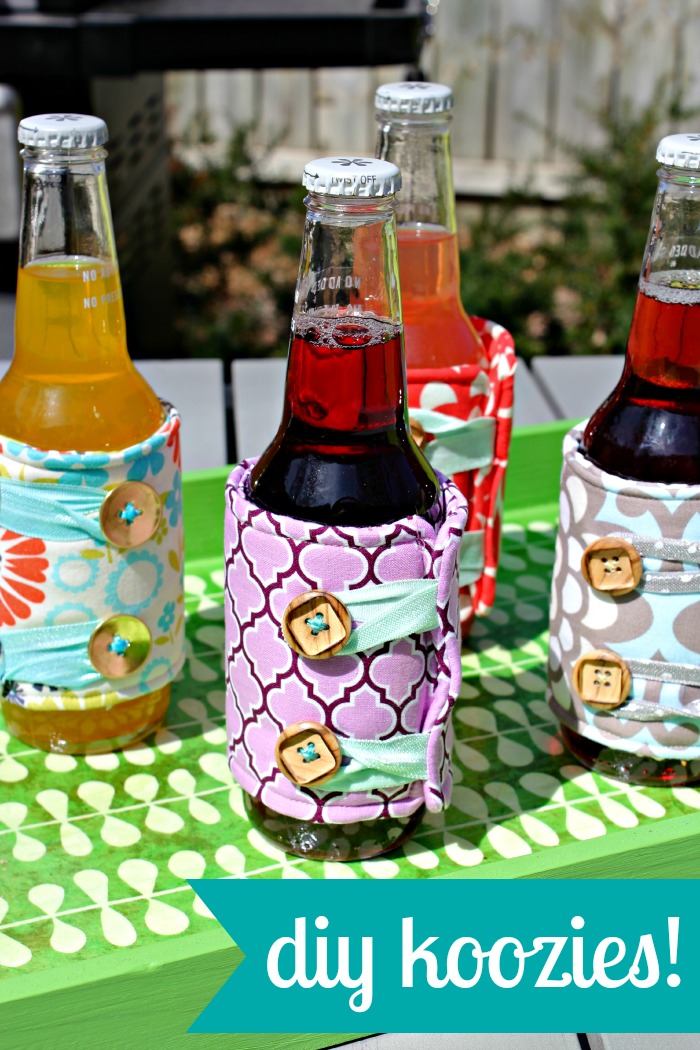
To fully dressed and ready to party …
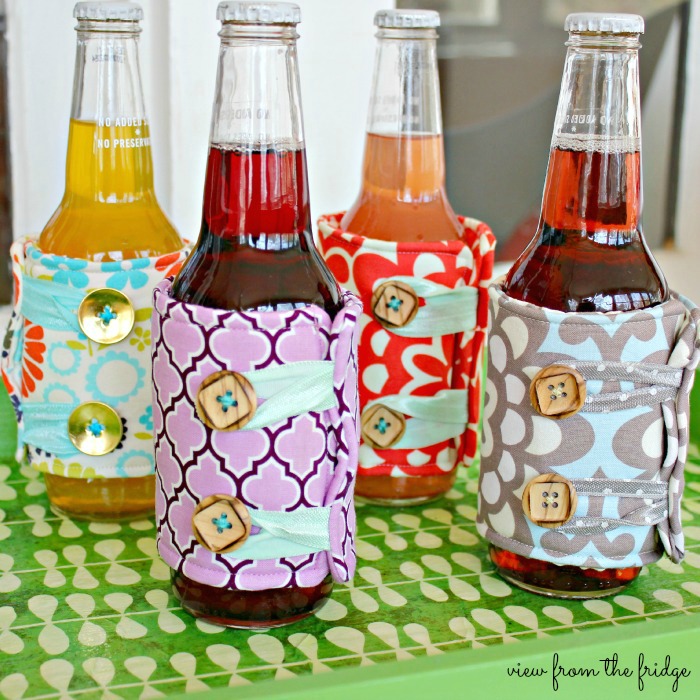
ALL DRESSED UP!
Now … these koozies work perfectly with BEER bottles, too. We just happen to be expecting a new arrival in a month, so these are my current beverage of choice. Can’t wait to enjoy a good IPA later this summer with my new koozies … and newborn.
JUST ADD YOUR FAVORITE BEVERAGE!
Wouldn’t these be fun to make for a bridal shower/bachelorette party?
Or maybe as a gift to your wedding attendees for the bus ride after the ceremony?!? A hostess gift for a backyard BBQ this summer?? So many possibilities!!
Thanks for having me here today! I had such a fun time with this project! Here’s to patio drinking weather!!


Jodie says
Pinned! These are so cute and perfect for all of the events coming up this summer- what a great idea!
Katie Stahl says
Thanks, Jodie!! I’m so glad you stopped by! I was thrilled to be guest posting here today … such a fun change of pace!
angel says
love these ideas! perfect for summer parties!
Katie Stahl says
Thanks, Angel! So glad it’s the start of warm weather season!!
Stephanie Turner says
What a cute idea!! I am pinning this to try out later!! Thank you for the tutorial and inspiration!
Katie Stahl says
Thanks so much for the comment, Stephanie! Have a great rest of your week!
XO,
Katie
terri says
pinned! but the Facebook link directly above comments is broken, bringing back a 404 =/ just a fyi
melissa@polishedhabitat.com says
Thanks for letting me know Terri! I appreciate it!
Sonnet @ SohoSonnet Creative Living says
These are AMAZING!! Such a great idea!!!
Anne says
Those are so cute! I might have to make up a set to give as a teacher gift this yea! I’ve linked to your tutorial on Craft Gossip:
http://sewing.craftgossip.com/tutorial-pretty-fabric-bottle-coozies/2014/04/24/
–Anne
Courtney @ Crafts by Courtney says
I think they turned out great, I’m really digging all the patterns you choose, very summery vibe.
Tara says
Love these! These would make great gifts, party favors, etc… Thanks for sharing! pinned.
Johnny says
What size seam allowance are you using? Did I miss that?
Melissa George says
The seam is 1/4″ – Thanks!
Johnny says
Thanks for the quick reply! 🙂
Rebecca says
Looking also to cover tea glasses, that way stays cold and know which ones are who! Can’t wait to get started